Ximfmail
> Documentation > Add-on: XIMFMAIL
XIMFMAIL is an add-on for Trustedbird.
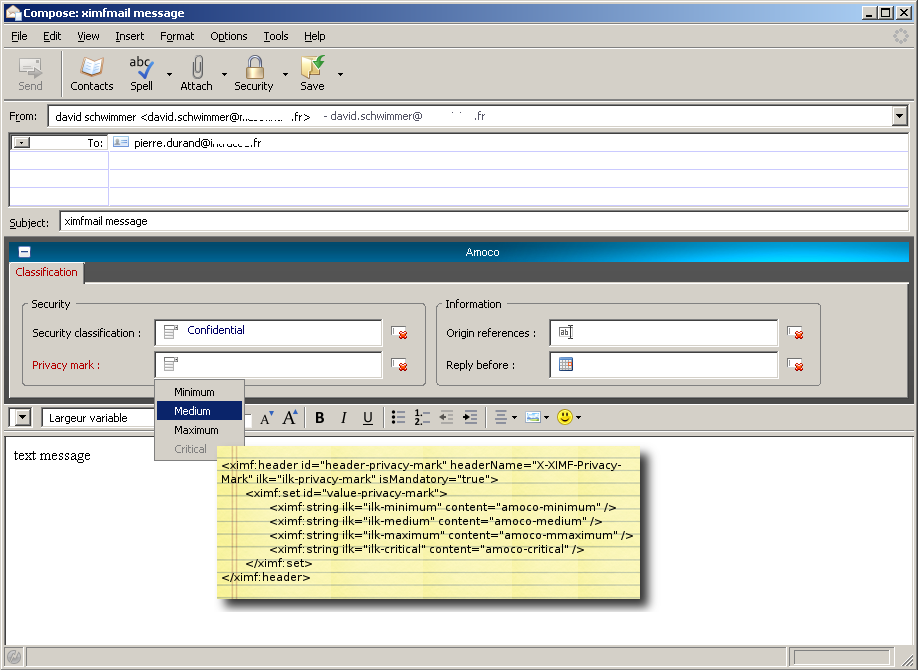
This add-on can produce forms for sending and receiving depending on another definition add-on. The definition add-on in XML is used to define:
- which headers are optional and mandatory,
- the headers that need to be displayed,
- the headers that must be inserted in the signature
Trustedbird can be customized for your personal mail needs (companies, public authorities, non profit organisations, …).
Complementary datas are transported in MIME headers respecting the XIMF format ((eXtended Internet Message Format).
Sommaire
What can be described in a definition add-on ?
A definition add-on allow you to describe with internationalised labels XIMF headers and their values.
A value can be :
- optional,
- mandatory,
- free text,
- restricted text
- text in opition list
- text composed with retricted text and free text
- value depending on another value
- …
- a date selected in a calendar,
- a specific address
It is possible to define rules on data of forms :
- to list headers to add to the signature (secure headers). Trustedbird kernel inserts them to the signature to the send message and allows the recipient to read and to verify,
- to provide compatibility with other formats using MIME headers (XSMTP),
- upon receiving the message, the image is displayed instead ofthe header,
- …
It is possible to organise the presentation of data in the outgoing message form and to define the headers in order to see in the main panel columns.
How test it ?
Install it
Create a ximfmail account
Create a ximfmail account
Ximfmail is a generator of XIMF headers multi-accounts. The creation of a specific account is necessary for good usage.
New account
- Launch Trustedbird client
- Open account settings manager : tools menu – Account settings…
- Click « Add account » : An account wizard opens
- Window new account setup : select « Email account » checkbox, then click « Next »
- Window Identity : write name and address of XIMFMAIL user.
- Window Server informations, 2 possibilities :
- Select « pop » checkbox and write the users incoming mail server, then click « Next ». Unselect « use Global Inbox » checkbox !
- Select « imap » checkbox and write the users incoming mail server, then click « Next »
- Window user names : write XIMFMAIL user name , then click « Next »
- Window account name : write XIMFMAIL account name, then click « Next »
- Window Congratulations : account settings are complete, click « Finish ». Account wizard is closing.
- Window account settings manager : click « OK »
Existing account
- Launch Trustedbird client
- Open account settings manager : tools menu – Account settings…
- Window new account setup : select XIMFMAIL account to modify and select « Server settings »
- Click « Advanced… »
- Window Advanced account settings : select « Inbox for this server’s account » radio button, then click « OK »
- Window account settings manager : click « OK »
- Window account settings manager : Select XIMFMAIL account to modify. Click on the XIMFMAIL account username.
- Click « Manage identities… »
- Window identities : select identity to modify, click « Edit »
- Window identity settings : click on « Copies and folders » tab. Select « other » and select XIMFMAIL user name:
- When sending messages, automatically :
- Drafts and templates, keep message drafts in :
- Drafts and templates, keep messagetemplates in :
- Click « OK »,
- Window identities : Click « OK »
- Window account settings manager : click « OK »
Configure a ximfmail account
Coming soon...
Using ximfmail
Coming soon...


